Recent Post
Thursday, January 22, 2015

Cabinets
Working on the downstairs actually started with a desire to improve the cabinets... but that plan was deferred. Several months back, I purchased some crown molding for the cabinets, and even black splash tile. But the more I put thought into it, the more I realized I wanted to go the extra distance and add cabinet lighting.I ordered LED cabinet lighting from an online source, which told me I needed to include a Magnetic Low-Voltage (MLV) transformer. I received the lights alright, but no transformer. Turns out, it was back ordered forever. Months later, after Christmas, I found the transformer on another site and low-and-behold, they had it in stock! In the mean time, though, I did all the other stuff I already talked about.
Well bored, and needing a project, I picked back up the cabinet effort. Here are my objectives:
- Raise the cabinets about and 1 1/2" (Done)
- Trim with bead molding (Partly Done)
- Trim with cove crown molding (Partly Done)
- Over cabinet lighting (To do)
- Under cabinet lighting (To do)
- Redo outlets and switches with Adorne Collection (To do)
- Backsplash (To do)
With the bead molding. I decided I would trim entirely around the whole cabinet. That means across the full edge of the top, down the side next to the microwave, and across the bottom. The one thing that bothered me originally was the sides of the cabinet face actually protrude past the side panel about 1/4". I saw where our neighbors builder just bent the bead trim inward, which looks half-assed. Our other neighbors had a piece of filler inserted in this space (which maybe that is the norm). Not liking any of these options, I decided to miter cut the small peices and trim around the whole profile. Wow! The result is subtle, but looks sophisticated and amazing!
 |
| A starter Hardywood collection |
 |
| Ran out of bead trim at the bottom left, more on order. |
 |
| Here is where we once kept our coffee maker. Less than two years you can see the damage. But fortunately it will get covered up with bead molding. |
 |
| Nicely mitered corner to run down the edge, adds another nice line to follow. |
 |
| You can see the back splash tile we are going to use. Might add 4" beaten copper decoratives to break it up. |
 |
| Nice shot (slightly outta focus though) or the way I trimmed around the edge. |

 |
| Excuse the mess, we were cooking. :) |
Friday, December 19, 2014

Adorne Legrande
We are really trying to bring in a level of WOW to our front entrance and formal Dining Room areas. With the completion of the Sitting Room, and Wainscoting in the main hallway, we started thinking there might be a couple more ways to add some jewelry to these spaces.First eye-soar was the heat registers. I can't believe how boring they looked, and more importantly how I didn't notice their blandness until after I started adding some trim work. I was certain they made designer heat registers, though I hadn't really looked or even thought of the concept. Well, after looking into the matter, we ended up replacing (most of) them with some satin nickel ones from Lowe's.

It was incredible the transformation this little enhancement made! But, be careful if you decide to do this yourself. Our home has a number of different sized registers. 4x10, 4x12, and 4x14. These Allen & Roth hear registers don't come in 4x14, so we are ordering the matte black ones for our Family Room.
Another enhancement we chose, was replacing the default electrical outlets, and switches with something nicer, something with more control. Shopping around I came to learn about the Legrande Adorne collection. This company makes it all, but yes, it will be $pendy! I've only replaced outlets and switches in a few locations, because the cost is too high. Maybe in time I will get to other spots.
Like the registers, replacing the outlets and switches in the Sitting Room, Dining Room & Foyer was mainly to bring another level of jewelry to these spaces. But, I also wanted functionality improvements as well.
Example... we usually leave early in the morning, and walk out the front door in darkness. This means I have to turn on the lamp light in our yard to get to the vehicle safely. When I come home, I can't help but feeling that I just wasted a whole day of electricity, since there is no way to turn off the light once I drive away. To solve this, I opted for the Adorne Sensaswitch.

I don't have the motion configured, rather we just set the number of minutes, and the lights automatically turn off.
Next to this switch, are two SoftTap switches, one for the hallway, and the other for the porch. Below are a few pics I took after installation.
 |
| Front entrance |
 |
| Wireless Touch Dimmer for the Sitting Room |
 |
| SoftTap switch for the Stairwell lights |
 |
| Outlet with custom face plate in the Dining Room |
Another option for the Adorne collection is the customizeable face plates. They add up too, but for the showy rooms, I splurged on them so the wall paint would match the face plate color. Instead of painting the insert that comes with, you can use wallpaper or whatever. We're pretty happy with the way it came out.
Enjoy!
Monday, December 1, 2014

This One is Real - Coffer Complete!
Holy smokes! Be ready for a ton of pics to show in this post. I am practically in disbelief that I was able to pull this project off. Have to say we are completely blown away with this coffered ceiling!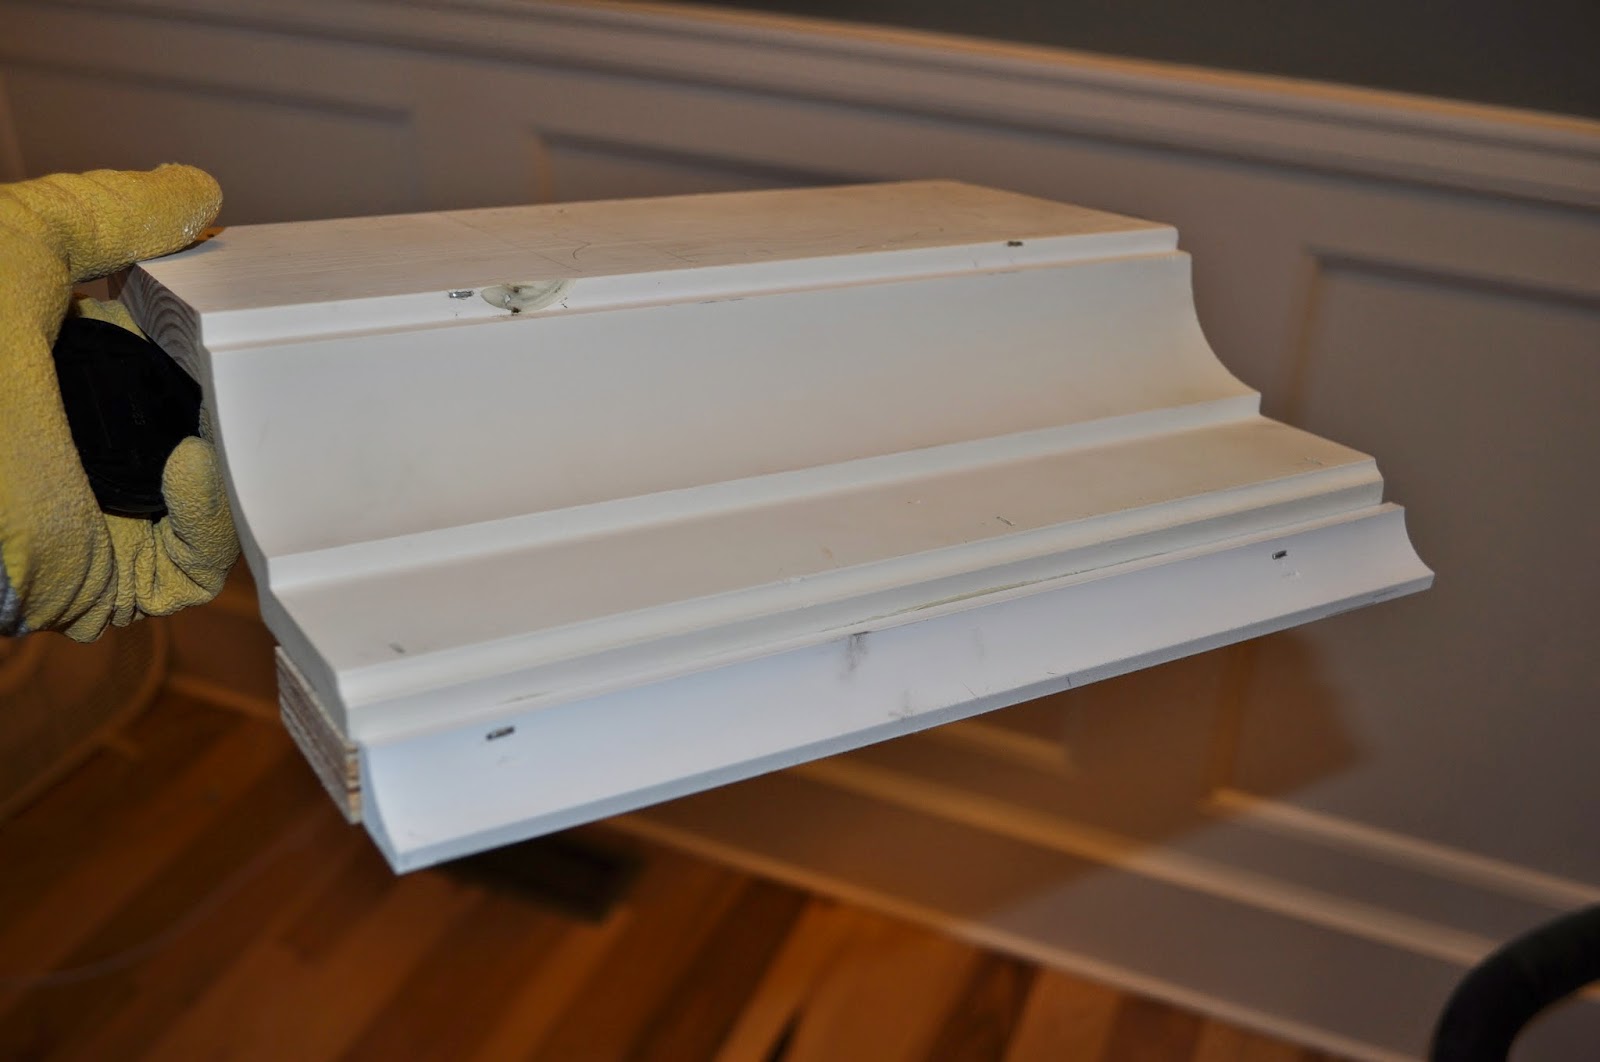 |
| Here is a template of the crown build-up I planned to use. |
 |
| There was actually a 2x4 stapled on to the back by my fingers, but I tore it off before taking the picture. |
 |
| I cut 3 ft. length 2x4 studs, and used metal brackets to fix to the floor joists in the ceiling. |
 |
| The vertical board is 4 7/16" width run through my table saw. It was cut from a 5.5"x12' MDF plank. The leftover piece I used as a build-up base to nail the 3/4" cove at the base of the coffer. |


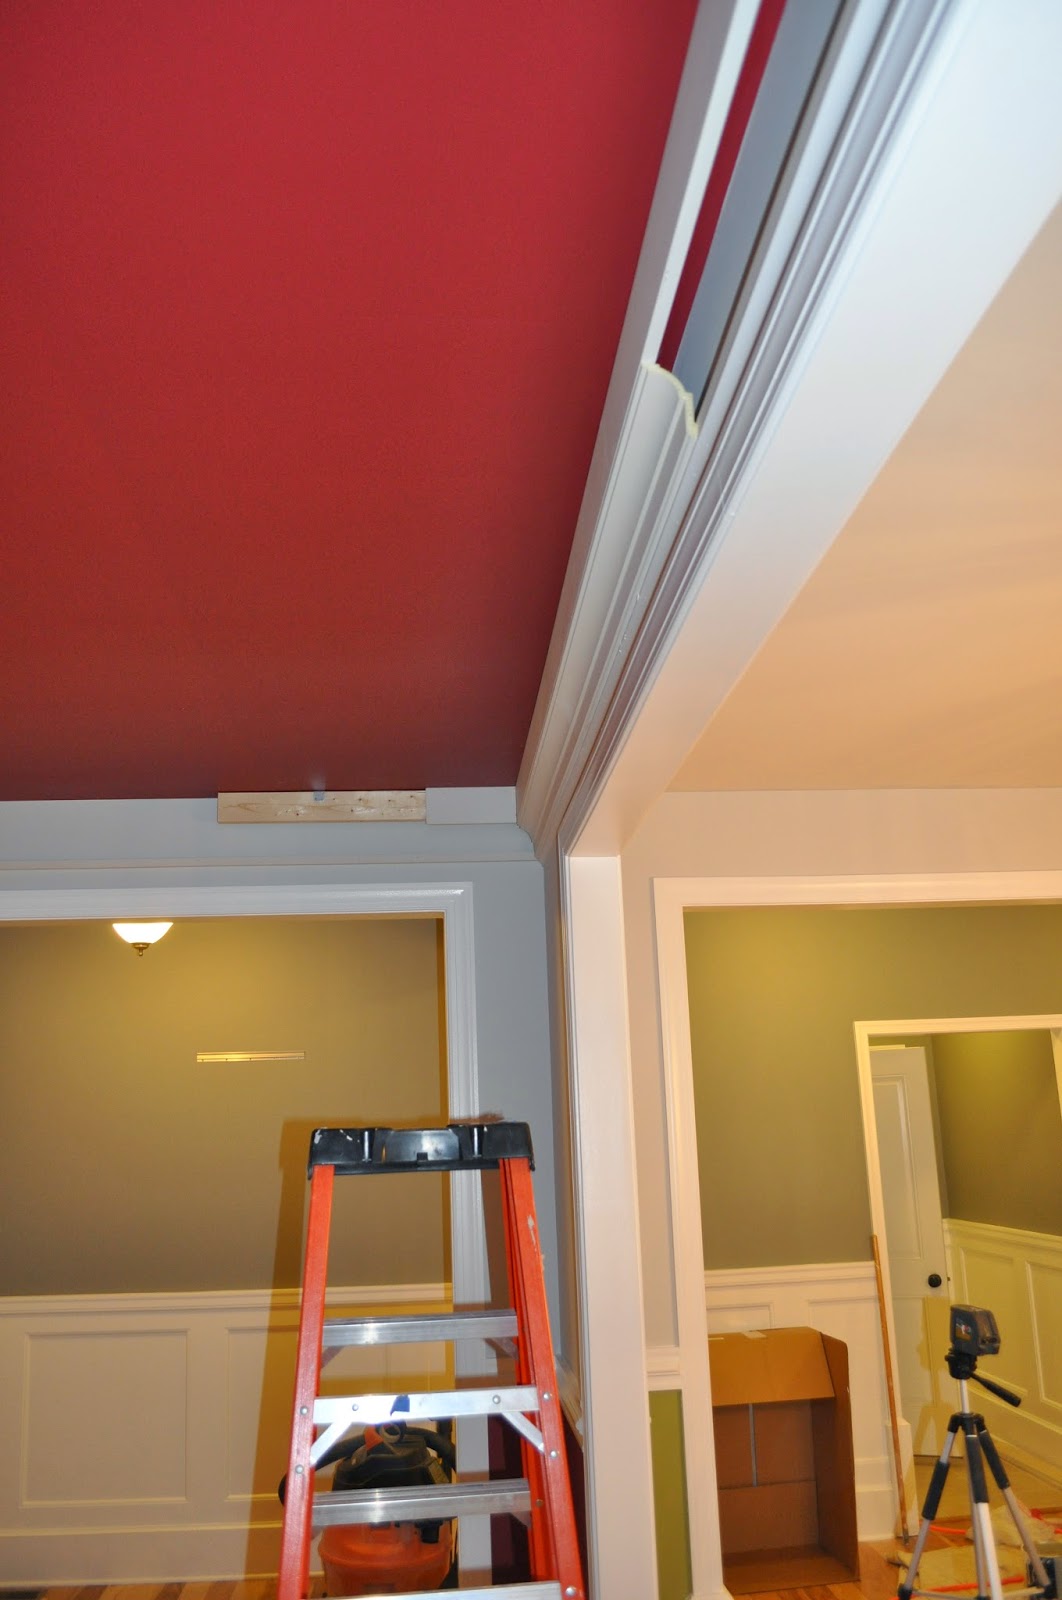 |
| This is a good shot of the profile of the crown build-up. With 12' MDF planks, I could run within a couple feet to the other side of the room, and using my 18 gauge brad nailer, nail the plank into the 3 ft 2x4 on the other side. |
 |
| This outlet is wired to the wall switch. I hijacked that to feed electricity to the 4" gimbal recessed lights, I planned to install above. |
 |
| Using a fiberglass "fishing rod" I pulled the 2-wire down the inside of the wall from a hole I made up top (to be covered up by crown). |
 |
| Here you can see the hole where the electrical wire comes out. |

 |
| These are the recessed lights we chose. The have a nice brushed steel bezel, and are designed for existing installation. We got them at Lowe's. |
 |
| Preparing for marking the location of the coffers. |

 |
| By taping, I am able to assess where the coffers are going to go, and whether their spacing is appropriate for the room size. |
 |
| I was going to just use the tape for placement of the MDF cross boxes I built, but the tape was cheap HDX stuff from Home Depot and it all fell off the ceiling by the time we got home from a short visit to some friends. |
 |
| These are the cross boxes I built to support the vertical MDF planks, and the pine coffer base. |


 |
| Conduit added to reduce chance of a nail penetrating the electrical wire. |
 |
| Here I have my first cross box installed. I used 6 wing-nuts each box to secure to the ceiling. |


 |
| Oops! Major screw up here. |
 |
| Whew! All better. |
 |
| First recessed light installed! I wired it up to ensure it worked with the wall switch. |
 |
| Using the coffer, I could run wire to a location in the ceiling where I could pop back up between two floor joists above, in order to get to the 4" hole cut for the recessed LED light. |

 |
| Now two installed! |


 |
| I used a solid piece of pine for the base boards of the coffer because I thought the MDF was going to possibly sag over time, if hung horizontally (it's super flexible). Plus, pine planes down nicely to get the 5/8" thickness needed for the profile I desired. |


 |
| All base boards installed, I finish by installing more 4 7/16" vertical MDF. |
 |
| I actually ran out of conduit on Thanksgiving Day, so I couldn't finish all the vertical MDF work until Black Friday. |


 |
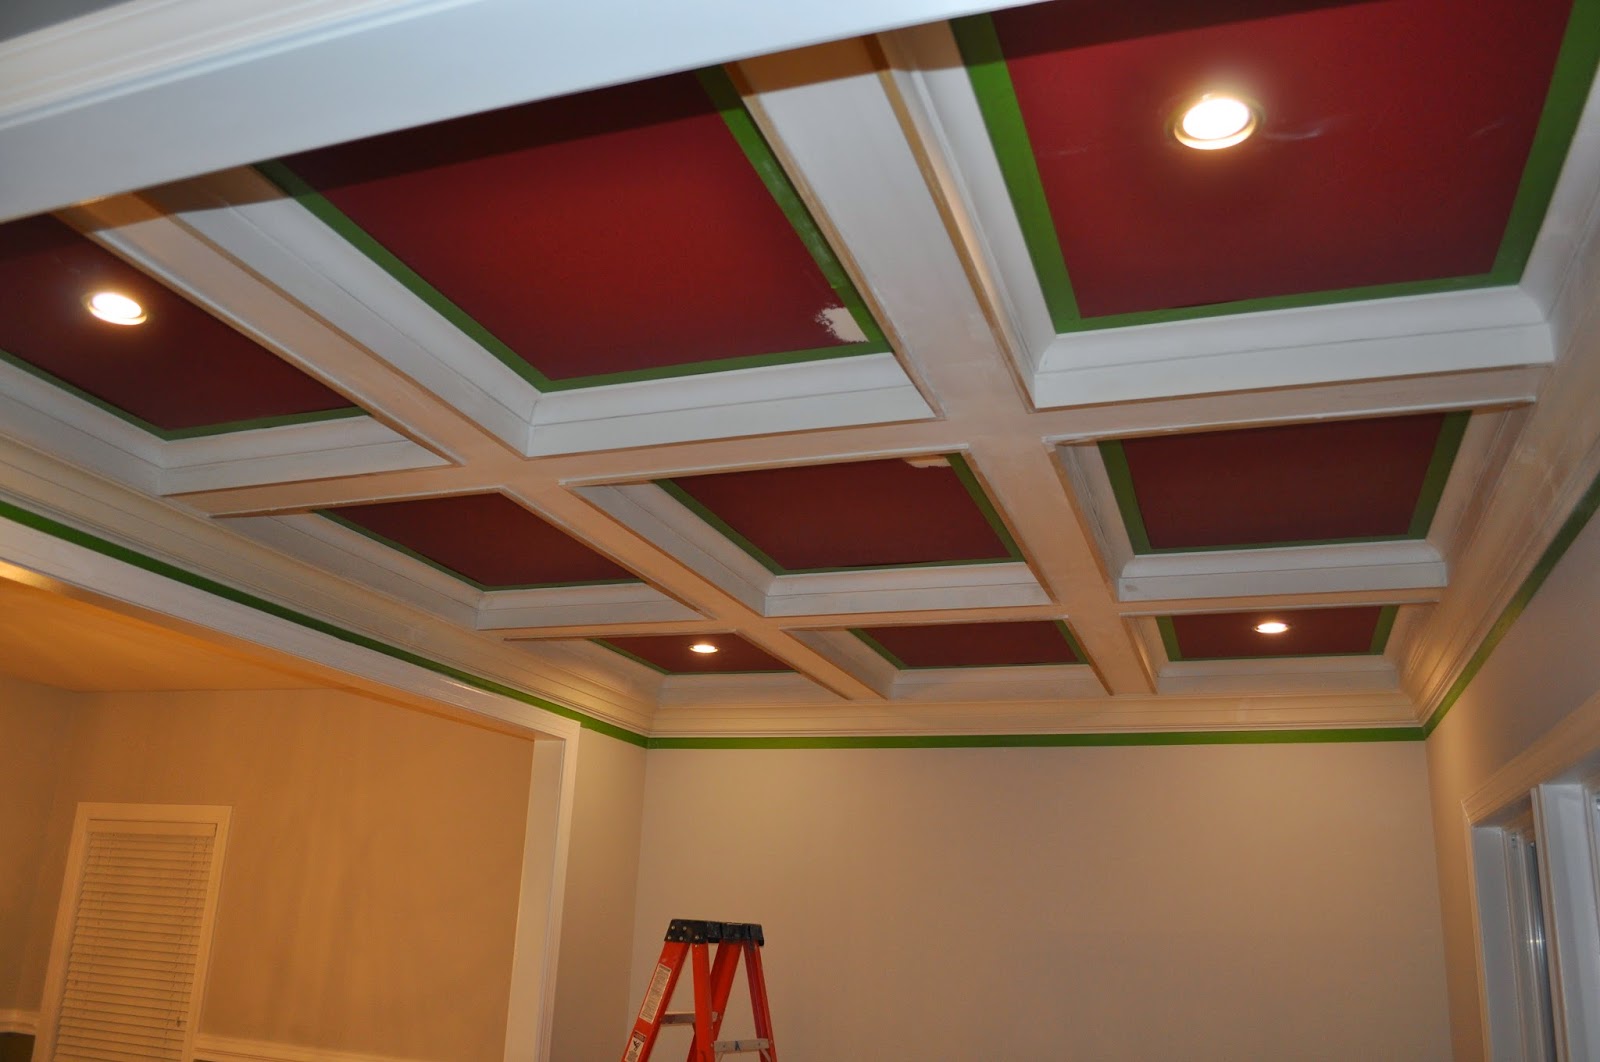
| Quick check with all lights actually recessed into place. |
 |
| Let the taping begin. |


 |
| I banged a few holes in the ceiling (and scraped my finger up pretty bad once) with my hammer. Gotta patch that! |


 |
| All painted! |


 |
| This is a nice picture I think! |


Subscribe to:
Posts (Atom)