Recent Post
Monday, December 1, 2014

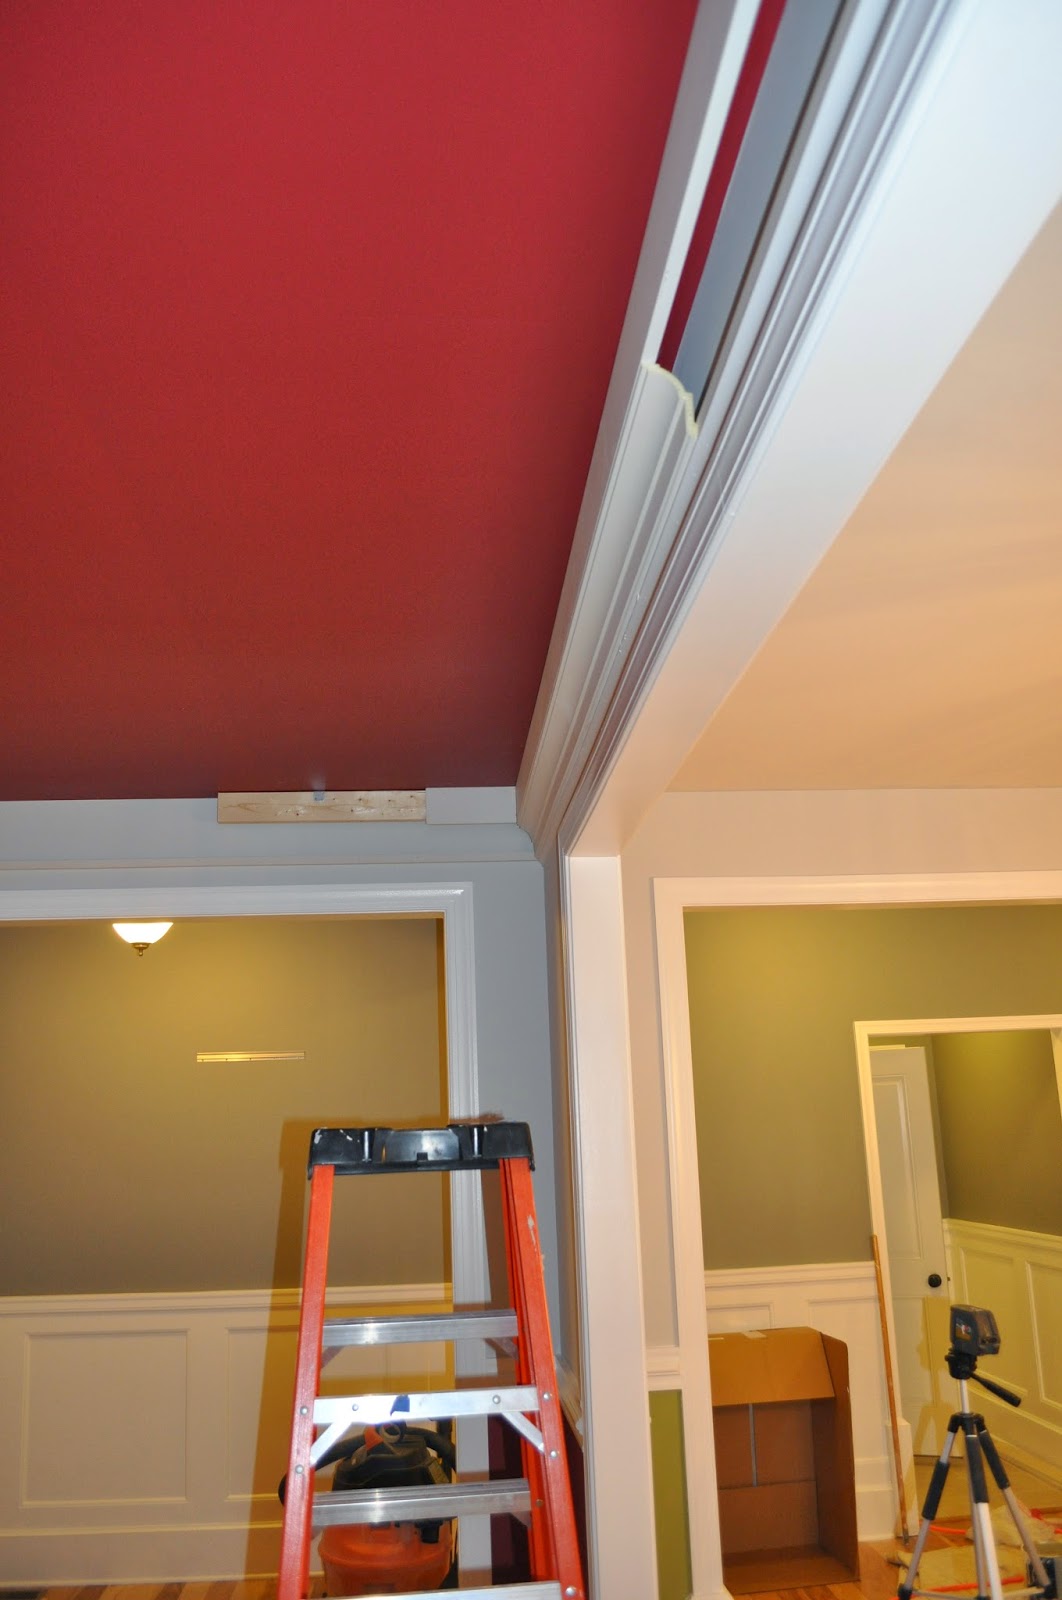
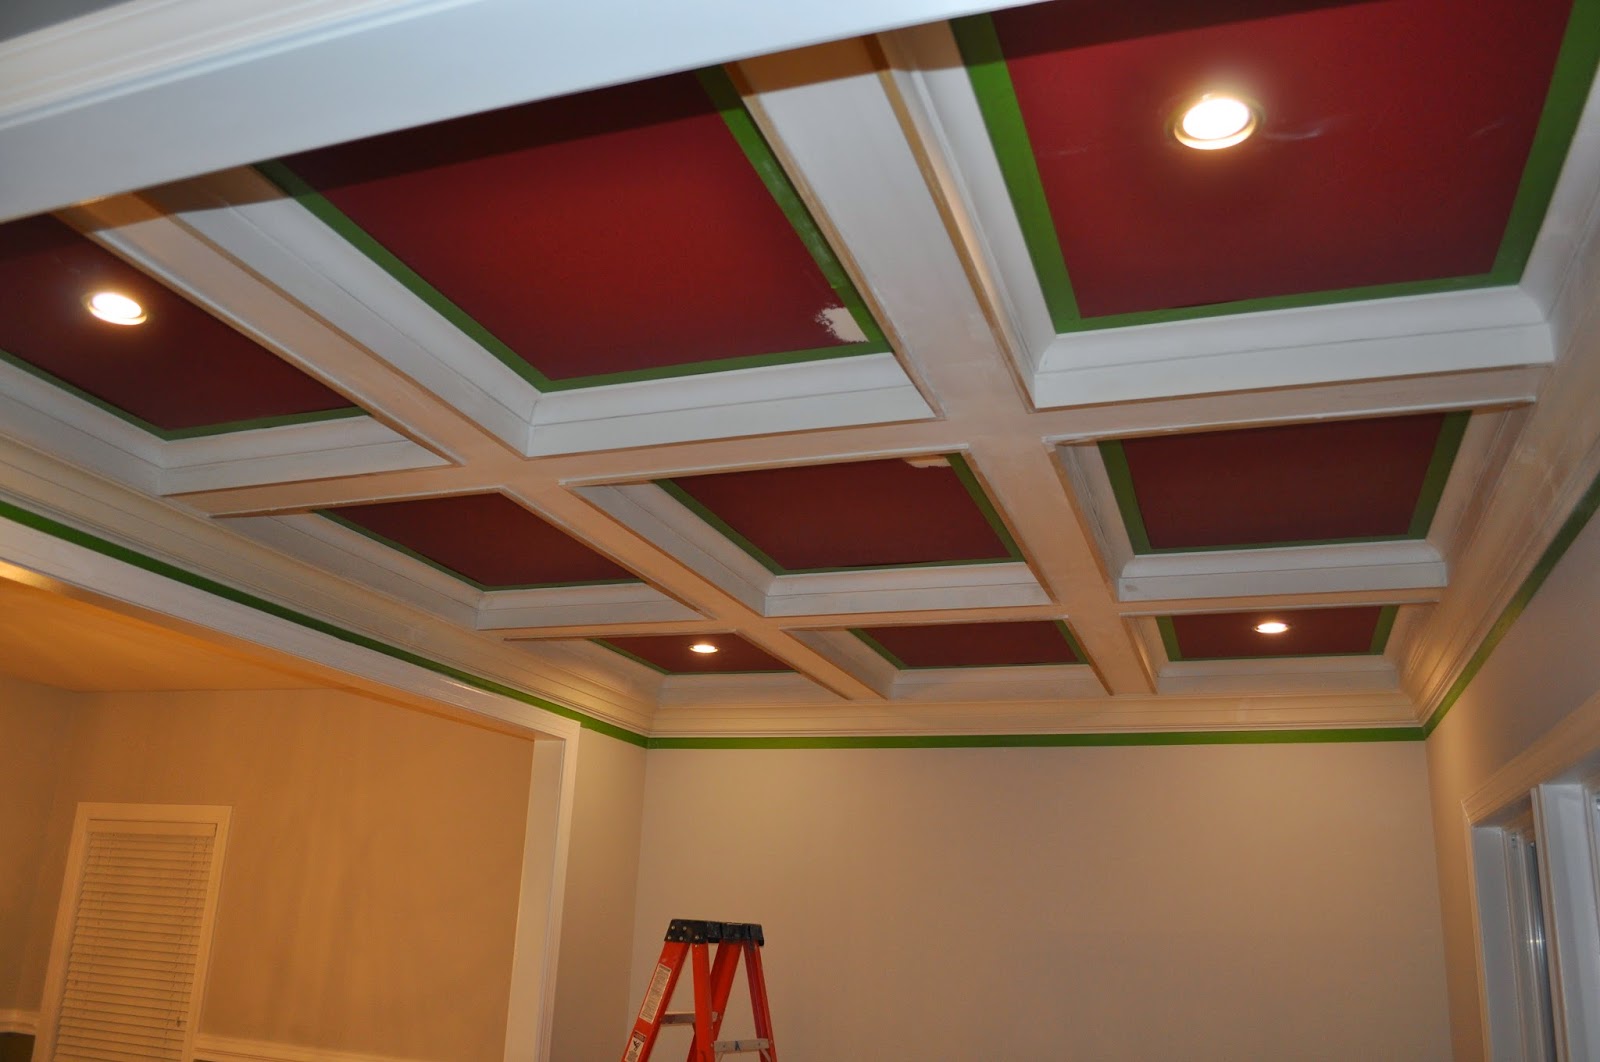
This One is Real - Coffer Complete!
Holy smokes! Be ready for a ton of pics to show in this post. I am practically in disbelief that I was able to pull this project off. Have to say we are completely blown away with this coffered ceiling!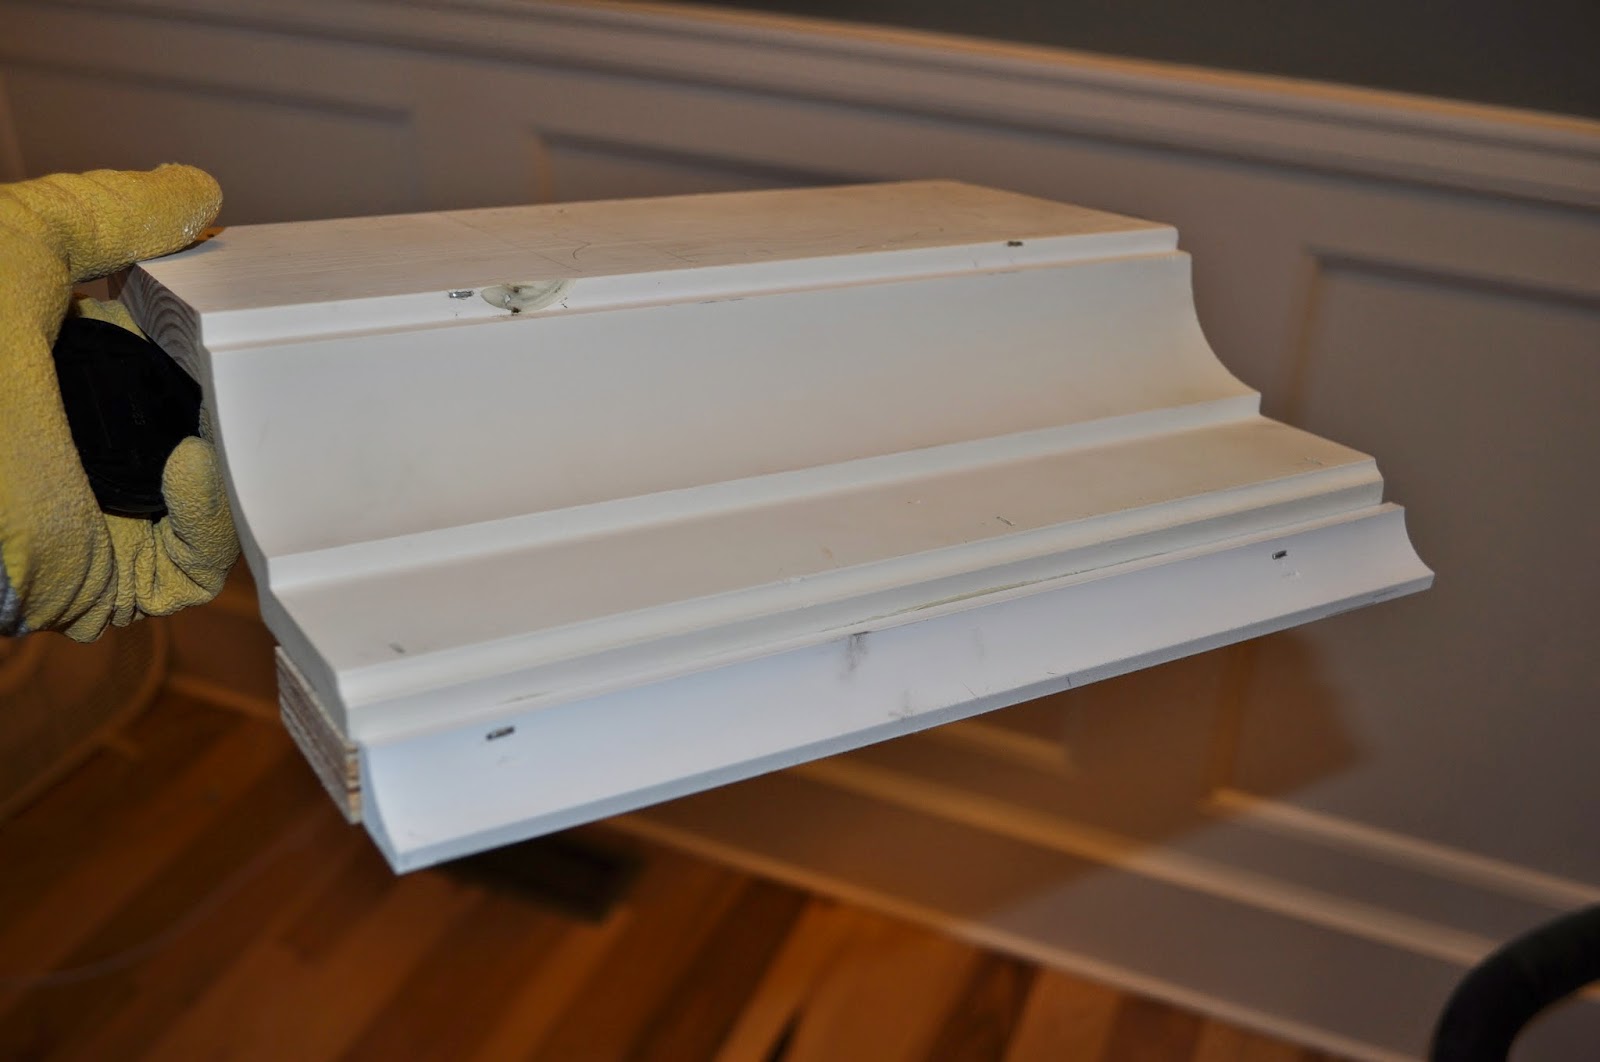 |
| Here is a template of the crown build-up I planned to use. |
 |
| There was actually a 2x4 stapled on to the back by my fingers, but I tore it off before taking the picture. |
 |
| I cut 3 ft. length 2x4 studs, and used metal brackets to fix to the floor joists in the ceiling. |
 |
| The vertical board is 4 7/16" width run through my table saw. It was cut from a 5.5"x12' MDF plank. The leftover piece I used as a build-up base to nail the 3/4" cove at the base of the coffer. |


 |
| This is a good shot of the profile of the crown build-up. With 12' MDF planks, I could run within a couple feet to the other side of the room, and using my 18 gauge brad nailer, nail the plank into the 3 ft 2x4 on the other side. |
 |
| This outlet is wired to the wall switch. I hijacked that to feed electricity to the 4" gimbal recessed lights, I planned to install above. |
 |
| Using a fiberglass "fishing rod" I pulled the 2-wire down the inside of the wall from a hole I made up top (to be covered up by crown). |
 |
| Here you can see the hole where the electrical wire comes out. |

 |
| These are the recessed lights we chose. The have a nice brushed steel bezel, and are designed for existing installation. We got them at Lowe's. |
 |
| Preparing for marking the location of the coffers. |

 |
| By taping, I am able to assess where the coffers are going to go, and whether their spacing is appropriate for the room size. |
 |
| I was going to just use the tape for placement of the MDF cross boxes I built, but the tape was cheap HDX stuff from Home Depot and it all fell off the ceiling by the time we got home from a short visit to some friends. |
 |
| These are the cross boxes I built to support the vertical MDF planks, and the pine coffer base. |


 |
| Conduit added to reduce chance of a nail penetrating the electrical wire. |
 |
| Here I have my first cross box installed. I used 6 wing-nuts each box to secure to the ceiling. |


 |
| Oops! Major screw up here. |
 |
| Whew! All better. |
 |
| First recessed light installed! I wired it up to ensure it worked with the wall switch. |
 |
| Using the coffer, I could run wire to a location in the ceiling where I could pop back up between two floor joists above, in order to get to the 4" hole cut for the recessed LED light. |

 |
| Now two installed! |


 |
| I used a solid piece of pine for the base boards of the coffer because I thought the MDF was going to possibly sag over time, if hung horizontally (it's super flexible). Plus, pine planes down nicely to get the 5/8" thickness needed for the profile I desired. |


 |
| All base boards installed, I finish by installing more 4 7/16" vertical MDF. |
 |
| I actually ran out of conduit on Thanksgiving Day, so I couldn't finish all the vertical MDF work until Black Friday. |


 |
| Quick check with all lights actually recessed into place. |
 |
| Let the taping begin. |


 |
| I banged a few holes in the ceiling (and scraped my finger up pretty bad once) with my hammer. Gotta patch that! |


 |
| All painted! |


 |
| This is a nice picture I think! |


Wednesday, November 26, 2014

The Sitting Room - Coffered Ceiling
I changed my mind. The crown I originally ordered for the Hallway, I decided to use instead to finish the Sitting Room.I got a ton or progress pics, but as of this writing I am not quite done yet, so I would rather wait to post them in bulk.
But, I won't keep you waiting... here is what it is gonna look like:


Thursday, November 20, 2014

Stairwell & Wainscoting Renders
I posted earlier some renderings of a vision I had for the Stairwell, most of that though was a concept centering on replacing carpet with hardwood. I think that is still in the plan, but I've since realized just how expensive that is going to be (including the Loft), and decided to hold off.Wainscoting, however, is relatively cheap. Well, cheaper. One of the key factors in wainscoting the Hallway was to use the same design concept that I created initially in the Stairwell. Now that I have pulled off, with a fair degree of success, adding wainscoting to the Hallway, and now to the Mudroom, I feel a bit more confident in tackling the Stairwell (minus hardwood floors).
The Hallway wasn't a total success. Yes, I am 99% pleased with the way it came out, but that 1% sort of bothers me. When I painted in Brown, and hated it, the dark color was too overpowering for the Olympic brand trim paint I was using. Even after a 4th coat, I could still see color. Tired of re-painting, I went to Lowe's to get a better quality paint. Here, an employee recommended the Valspar Semi-brilliant White Signature Series paint (did not require mixing). After a couple applications of this, yes, it definitely covered up the old brown, but the way this paint dried left a really bumpy texture. At first I thought maybe the fan was one and causing it to dry too fast. Not so, as the next day I applied another round, and same thing. In fact, this paint is so sticky, that it leaves little flakes sticking out, possibly form a former dried coat. I also thought it was the roller. Not so, as I even tried different rollers. So I am as of this post, unsure how to solve this problem, since I would really like a nice smooth trim white surface.
Enough of that. I still have much more trim painting to do, so perhaps I will find a brand that will work.
More on to some eye-candy...
These pics are renders I created in Sketchup. I switch to a portrait view to capture some of the height characteristics of the Hallway.
 |
| That print is wall art I found online, so I ordered it. We are going to frame it in a distressed white picture frame, maybe something off of Etsy. |
 |
| Been watching a lot of youtube vids about how to make newels, and replace carpet stairs with hardwood. I like the columns here, since they add continuity and sophistication. I think I will be doing that next. |

Thursday, November 13, 2014

More Wainscoting
After running chair rail throughout, and painting, the main hallway into our home (Foyer?) felt like it needed something extra. To be honest, I was really struggling with paint colors, and painting beneath the chair rail these solid colors--red for the Sitting Room, green for the Dining Room, dark gray for the Family Room--I started to see too much of the same effect. I dunno, it just wast right.
Also, I didn't really have a color planned for the hallway. We looked at the red and the green in the adjacent rooms, and thought that maybe these were Fall colors and so came up with a plan to paint the hallway a dark chocolate beneath the chair rail that ran through this space. Well what about above the chair rail? For that, we tried a khaki color. It wasn't until I started painting the same khaki color into the Sitting Room, that I came to my senses. Actually I didn't come to my senses, at first. Rather, I had a total meltdown! Ya, I was definitely upset. The colors sucked, though I admit, on their own would have looked good, but the correlation, the continuity with the rest of the house was a total loss.
When expressed this at the dinner table, we came up with a better plan. Why don't we capture the grays that we have elsewhere, and for the bottom half of the hallway, let's do wainscoting?
I started to like the sound of that, and quickly started to feel better.
Though it has been a lot of work, here are some pictures of my progress (not totally finished at the time of this writing).
 |
| This is our Dining Room. We all love the green color! The wall above the chair rail has not been painted here at the time of this photo. |
 |
| Here you can see the Sitting Room. The red is called Cabin Red, and we were most worried about how it would turn out, but when it dried we fell in love with it too. |
 |
| Here is me taping. Shortly after painting this, and painting the top half khaki, I lose it :) |
 |
| This is after my meltdown, where I am starting to install the wainscoting to cover up my mistake. I've already painted over the khaki above. We used a medium gray color called Gravity. |
 |
| The laser level is essential! Here i am creating support for 3/4" cove, as well as pine boards I planed down to a desired thickness. |
 |
| Corner miter. |
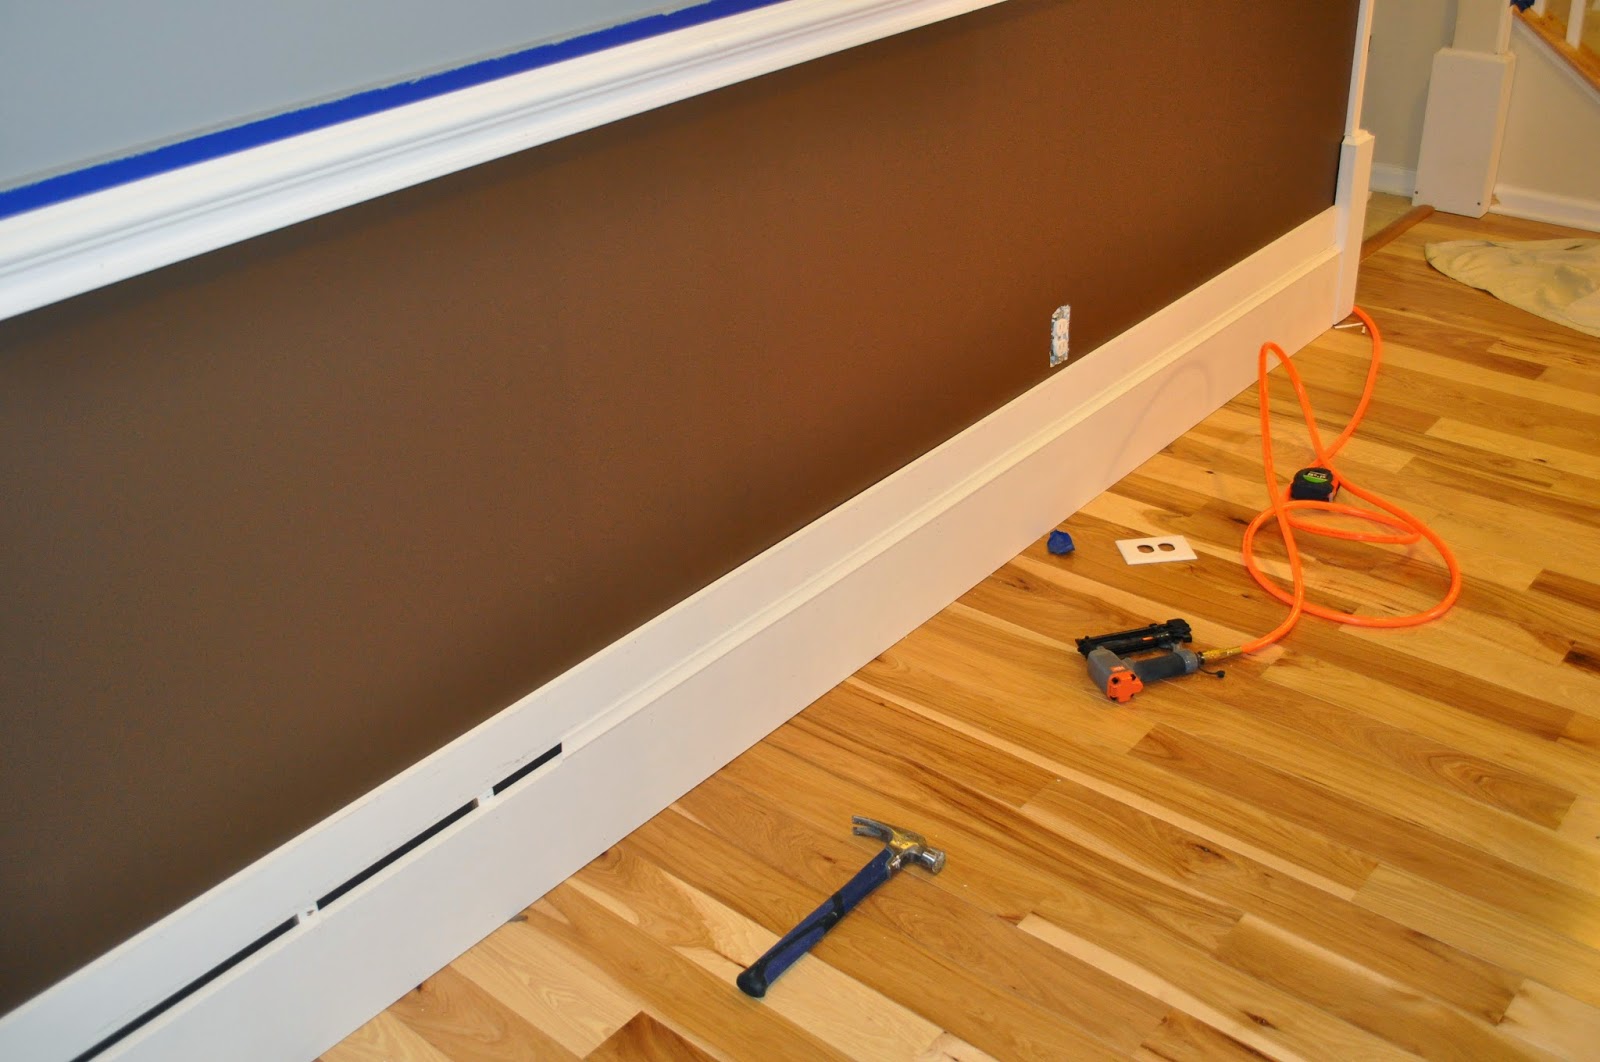 |
| Here you can see the top rail. I tore down the chair rail in the hallway, since it wasn't going to work with the wainscoting. I still wanted to use brick molding, and with my expert second opinion provider (wifey), decided to use a full piece and not reduce thickness. It looks chunky and very solid against the raised base boards. |
 |
| This is the first vertical slat to the wainscoting. Again, super chunky! |
 |
| Here you can see all of the slats installed. |
 |
| Goodbye chocolate, hello ultra white! |
 |
| Here is a good shot of the whole hallway with the gray color above. There is a lot of finishing detail I need to do still, mostly touch-up work. |
 |
| I love this shot. The base boards are still not cut for the boots, but the layered trim work looks like Gotham-style skyscrapers! |

 |
| The other direction, from the front door. It is hard to tell, but I painted above the chair rail in the Dining Room and Sitting Room the same light gray (Warm Chinchilla) that we originally used in the Morning Room. |
So still a lot of work to do. The shoe trim to the baseboards is not installed yet, and neither are baseboards around the boots on each entrance. Then there is a lot of paint touch up.
Finally, if you notice the ceilings, I took no precaution to tape them off. This is because I have crown molding going up. In fact, I can't wait to start that project! My plans for the ceiling are going to make the space spectacular.
Thanks for following!
Subscribe to:
Posts (Atom)