Wednesday, October 23, 2013
Home
Garage plans
Garage plans
After my folks left, I started cleaning out the garage. Lots and lots of saw dust.I had been planning to paint the garage floor with epoxy paint, and actually bought some before my folks arrived, but I wasn't able to get to it in time, which was a good thing, because the process takes several days to complete.
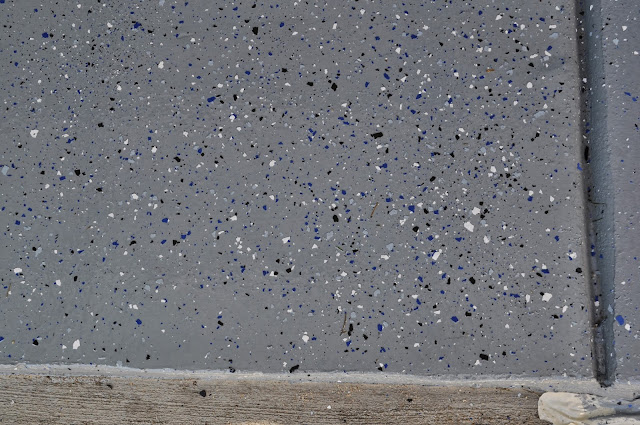
I bought the Valspar stuff at Lowe's. Mostly, it had the best reviews. I was going to tint, but after thinking about it a day or so, I decided not to tint, and just go with the gray kit that comes with black, blue, and white sprinkles.
If you decide to do this, know that the gallon that comes with this kit, is not a full gallon. It's enough though, with the hardener added, to cover one half of the garage, and maybe a little extra (in my case, I was able to paint 3 squares).
But, the sprinkles were not enough. Fortunately, I was able to get my queen to pick some more up on the way home right as I was finishing the second square. This got me through into the 3rd square also, knowing the next day I was going to have to go back to Lowe's and get another kit.
First Day...
So that picture above is one kit, plus an extra shaker of sprinkles.
The next day, after researching the deal some more, and trying to find another Lowe's that wasn't out of stock for the gray kit I was using, I started reading up on the clear coat you can apply afterwards. Well, I did like the gray, and I did end up liking the sprinkles, but it became clear that the clear coat was going to be needed to seal in the sprinkles and give the floor a real professional look!
So I bought the second kit, and I bought two clear coat kits. Sheesh! Really adds up!!!
$74x2
$94x2
$10x1
Total: $346
Well, it's only money!
Yesterday, I etched the fourth square. Be prepared because you have to spray off the floor to get the acid off, and that causes the concrete to get wet, taking another full day at least of drying time. Today, the last square was ready to be painted, and the first three squares were ready to be clear coated.
Clear coating was a lot easier! Stuff turns white looking when you mix in the epoxy, but it clears up soon enough. But, the added glossy shine is worth it! And the floor is that much more sealed.
In the pictures above you can really see the gloss. Also, be sure to do this on a breeze-less day since little grass and leave pieces can blow in (I had to pick out a few that got stuck).
Tomorrow, I plan to clear coat the right 1/2 of the garage.
So what is next?
All this work in the garage has got the brain thinking, else sniffing all that epoxy has got me coming up with some crazy ideas.
Since I currently don't own any tool chests (tools are actually sitting in a Rubbermaid bin in the living room), I've been spotting these Huskies over at Home Depot.
I am thinking I want two of them since they are fairly cheap and have pretty good reviews. The drawers feel nice, and will be a good fit for some smaller power tools, like drills jigsaws, etc. The wood top is a huge plus, and though not real chopping block maple, will still make a great work surface. I am really close to pulling that trigger.
Next up, the walls. OMG... that concrete does not look good against my new glossy floors! Because you know, you have to look good running all the power tools. I've been looking at a range of storage shelves, and cabinets, and there are a lot out there, but 1) they won't cover up the concrete walls, and 2) they are pretty expensive. Beside's I am just not there yet.
Instead, what I came up with was to surface the concrete with 4' Diamond Plate sheets. Since the concrete walls protrude a little, and only come up a little less than 3', I plan to build up the wall with studs to create a mounting point for the diamond plate, additional wall outlets, and a small white trim shelf along the top. So imagine a small 4' ledge around the garage, covered in diamond plate, and a 5" strip of white trim to top it.
The really expensive part of the cabinet systems out there is in the wall track systems. I felt they were too expensive and too proprietary, meaning only their clips would work. I started thinking of peg board as a far less expensive alternative, but peg board is cheap MDF, breaks, and may not support a lot of weight.
Then I found metal peg board. It holds up to 600 lbs. So I am thinking of finishing the drywall, and putting up this blue stuff along the whole wall.
That's about it for the garage plans for now. Well, there is still my plans for a loft, but not gonna get to that for some time.
Thanks for reading!
Subscribe to:
Post Comments (Atom)


You came up with a nice plan. I love seeing a finished garage. We used the cream expoxy from Lowes. Don't forget to send pictures of final project.
ReplyDelete